Pages

Showing posts with label crochet pattern. Show all posts

Friday, June 28, 2013

Amigurumi Class


Amigurumi Class


Last week I took a class on Craftsy  by Stacey Trock of  Fresh Stitches called “Design your own Monster".  It was all about designing crochet amigurumi.  It was an excellent class and I highly recommend it.

The class is $20.00 and worth every penny.

She teaches you how to make various pieces of monsters and how to put them together.  She takes you through different types of monsters to crochet and in each lesson you learn several new techniques.  You also learn how to take a drawing and turn it into a cute stuffed amigurmi..

I’ve always wanted to make stuffed toys but for some reason I though they were very complicated to design and make.  No More!  After this class I designed this cute little cloud amigurumi (I’ll be offering a pattern soon). 


I also designed a Humpty Dumpty.  I had knit one several years ago for my first grandson, but it took forever and I wished there was a crochet version.  After this class I was able to design the crochet version I had always wanted. 


This cute little fellow was one of the monsters you could make in the class. 


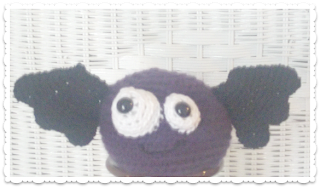
I also made this bat for my daughter who likes bats. ( I actually purchased the bat pattern thru Stacey as I wanted to learn how to make wings and that was the one thing not taught in the class.)
 

If you’ve never taken a class by Craftsy, you should check them out.  They are reasonably priced and they offer sales and discounts all the time.  The classes are available forever and you can watch the videos over and over.  Plus you can interact with other people in the class if you’re so inclined.

That’s what I learned this week. How about you?


Monday, April 22, 2013

Such and Stuff


P Q R S is for Such and Stuff


I’ve been buying a lot of patterns lately so P is for patterns.  You might wonder why I would need to buy patterns when I could probably figure it out myself.  But sometimes I don’t feel like figuring it out.  Sometimes I just want to sit and crochet and not have to pick colors or figure out sizing.  Plus buying others designer’s patterns, I’ve actually learned a few new things, like a neater ending for crochet or how to add crochet  flowers to a bunting.

Q is for Quicker.  I’m always looking for a way to streamline my knitting or crocheting so it takes less time.  But sometimes I just want to take my time and mosey along working on a more complicated design.

R is for Rainbow.  And though I love colors I’m not always good at combining them prettily.  So I’ve bought several patterns by ATERcrochet  because I love her use of color.  Plus her patterns are wonderful.

S is for Slip Stitch, my new favorite stitch in knitting.  With it you can make items look like plaid, or tweed or bricks.  It’s so fascinating and I have several things in the works using slip stitch. 


That’s what I’ve been doing lately, studying new patterns and new ways to knit and crochet, when I thought I “knew it all”.  I love learning new stuff so it’s been fun and relaxing.

Sunday, April 7, 2013

F is for Free Pattern


F is for Free Pattern


This is a free pattern for those barefoot sandals that are all the rage.

Pattern:  Barefoot Sandal

Material:  cotton thread size 3 (Aunt Lydia’s fashion 3 in Maize is used in pattern)

Crochet hook : size D (3.25mm)

There’s really no gauge.  Want it bigger, use a bigger hook or thicker thread.  Want it smaller, use a smaller hook or thinner thread.

The finished size of my motif without the strings attached was 2.5 inches high by 2.5 inches across at the base.

This patten is written in American terms.

Abbreviations:
Chain – ch
Slip Stitch – sl st
Single crochet – Sc
Treble crochet – Trc
Space - sp
Row 1:  Ch 6, slip stitch  in first chain  to form ring, ch4 ( counts as first dc, ch1),  (dc in ring, ch 1) 11 times.  Sl st to third ch of ch 4. (12 sts)

Row 2:  Sl St into next ch 1 space  , ch 4, *( trc, ch 7, trc) in next sp, (ch 1, dc in next sp) 3 times, ch 1; repeat from * once more, (trc, ch7, trc)  in next sp, (ch1, dc in next sp) 2 times, ch1 sl st to third ch of beginning ch4 .

Row 3:  *In next ch 7 corner  sp, (sc, ch1,sc, ch5, sc,ch1,sc), then (ch1, sc in next ch1 sp ) 4 times, ch1, repeat from * once more, (sc, ch1, sc, ch5, sc, ch1, sc) in next corner sp, (ch1, sc in next ch1 sp ) 4 times , ch1 sl st to first sc made.  Fasten off

That’s your motif.  Now we’re going to attach the strings.

First the part that goes around the toe.  Attach the thread in one of the CH 7 loops with a sc, ch 10, sc in ch z loop.  Fasten off.

Now for the ties:  Attach yarn in a different ch7  loop with a sl st, ch 100, sl st in loop.  Fasten off.  Repeat in other ch 7 loop.

Weave in ends.  And you’re done!

Make it your own, add beads or shells, do it in three different colors, have fun!

Please don’t copy or sell the pattern.  If  your friends want a copy send them to my blog to get it.

Feel free to make and sell as many barefoot sandals as you can.  Teach your teen to crochet with this pattern.  Maybe she’ll sell them to her friends and make enough to go to that rock concert.


Thursday, March 7, 2013

FREE Peacock Feather Pattern - It's Finally Here!


 You've seen them on Pinterest and tried to Google the pattern, but there was none.  So I sat down the other day and figured out the pattern for crochet  peacock feathers.  I'm so excited to be able to share it with the world.